Welcome again to The eTech Journal……
Today, We brng you this awesome Tutorial which lets you Add Fancy Cloud Label Widget On Blogger.
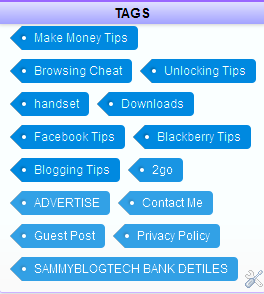
Below is how this will look like when you implement it on your blog.
Follow the below steps to implement this on your blogger blog…
1. Goto your blogger dashboard
2. Select the blog you want to add it to and navigate to ‘Templates’ Click on EDIT HTML
3. Search For ]]></b:skin> . Add the Below Code Just Above It
/*—– Custom Labels Cloud—–*/
.label-size{
margin:0;
padding:0;
position:relative;
}
.label-size a{
float:left;
height:24px;
line-height:24px;
position:relative;
font-size:12px;
margin-bottom: 9px;
margin-left:20px;
padding:0 10px 0 12px;
background:#0089e0;
color:#fff;
text-decoration:none;
-moz-border-radius-bottomright:4px;
-webkit-border-bottom-right-radius:4px;
border-bottom-right-radius:4px;
-moz-border-radius-topright:4px;
-webkit-border-top-right-radius:4px;
border-top-right-radius:4px;
}
.label-size a:before{
content:””;
float:left;
position:absolute;
top:0;
left:-12px;
width:0;
height:0;
border-color:transparent #0089e0 transparent transparent;
border-style:solid;
border-width:12px 12px 12px 0;
}
.label-size a:after{
content:””;
position:absolute;
top:10px;
left:0;
float:left;
width:4px;
height:4px;
-moz-border-radius:2px;
-webkit-border-radius:2px;
border-radius:2px;
background:#fff;
-moz-box-shadow:-1px -1px 2px #004977;
-webkit-box-shadow:-1px -1px 2px #004977;
box-shadow:-1px -1px 2px #004977;
}
.label-size a:hover{
background:#555;
}
.label-size a:hover:before{
border-color:transparent #555 transparent transparent;
}
4. Now Goto Layout > Add Gadget > Label Then add. In the Label Customization, Tick ‘Cloud’ in the Label Display option.
5. Save and preview


