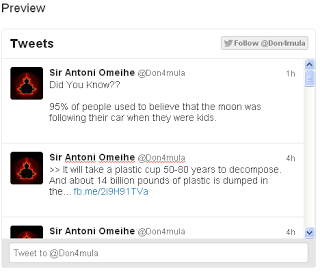
This Tutorial Takes Approximately 7 mins to complete. See Demo in the Above Photo
Follow the Below Steps and you will be done.
Goto Twitter Widget Configuration Page
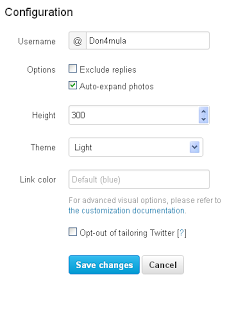
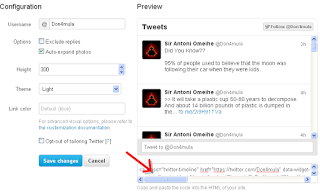
Input your Twitter Username, Select Your Preferred Width and every necessary things there and click on Save changes. Then Copy your code from the place as shown Below:
Alternatively, You can copy the code below and change your Username, Width
<a class=”twitter-timeline” width=”250″ height=”250″ href=”https://twitter.com/Don4mula” data-widget-id=”369832845646110720″>Tweets by @Don4mula</a>
<script>!function(d,s,id){var js,fjs=d.getElementsByTagName(s)[0],p=/^http:/.test(d.location)?’http’:’https’;if(!d.getElementById(id)){js=d.createElement(s);js.id=id;js.src=p+”://platform.twitter.com/widgets.js”;fjs.parentNode.insertBefore(js,fjs);}}(document,”script”,”twitter-wjs”);</script>
After Getting Your Own Code, Navigate to Blogger.com, Locate The Blog you want to add This Widget to, Goto ‘Layout’ Then ‘Add Gadget’ Select ‘HTML/JavaScript’ and then Paste The code. Then Save.
#Conclusion: Over To You Boss!!! What do you think About this Post?? Do you have further clearifications? Feedbacks? Suggestions? Or Inquiry? Why Not Use The comment Box To Communicate With Us? We will be Happy If you Do.


